There are a lot of machines on the market when it comes to sewing and embroidery.
Sometimes, it is easier to purchase a combined machine, then having to spend money on two different machines.
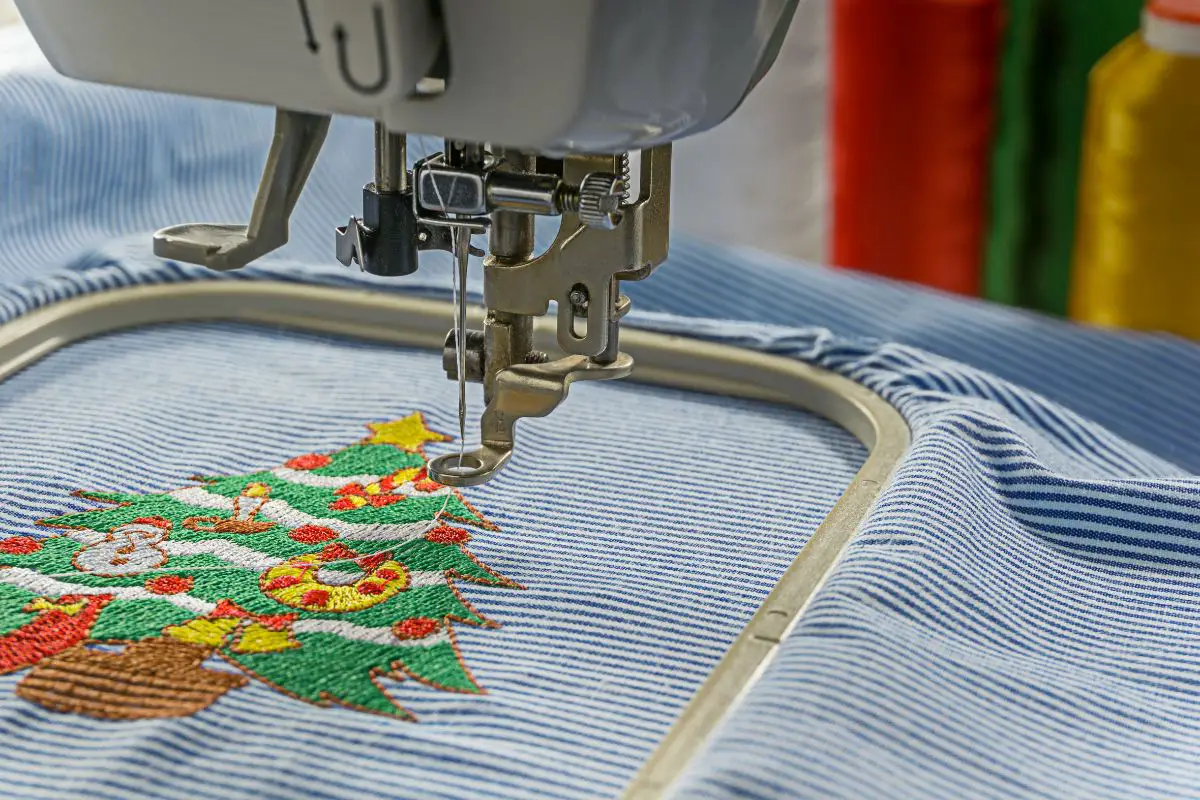
The Brother SE600 sewing and embroidery machine ranks as one of the most popular and reasonably priced Brother sewing and embroidery machines.
The Brother SE600 is user-friendly for beginners and caters to people who wish to sew and embroider with only one machine.
While the 4′′x4′′ hoop isn’t suitable for everyone, there are a lot of other features that may appeal to you with this machine.
In this review, we will discuss every aspect of the Brother SE600, including its features, and pros and cons you need to be aware of with this machine.
Brother SE600 Features Overview
The Brother SE600 can do it all, it can help you sew various garments thanks to its 103 built in stitches and 10 buttonhole options. It has a sewing speed of 710 stitches per minute.
In addition to this, you can also complete your embroidery patterns on this machine as well.
There are 80 embroidery designs installed into the Brother SE600. Although, there is also a built-in USB port which you can use for your embroidery patterns.
Overall, the Brother SE600 is a slightly larger machine, being 21.2 x 15.5 x 16.5 inches.
Furthermore, this machine weighs around 14.3 pounds, so it is quite heavy. There is also a 25-year warranty on this machine to ensure you are happy with it.
What Is Included With Your Brother SE600?
If you do decide to buy a Brother SE600 sewing and embroidery machine, then inside the box, you will receive more than the machine.
There are a number of accessories that the Brother SE600 will come with.
With your Brother SE600, you will receive the following items:
- Brother SE600 machine.
- Power cord.
- Foot pedal.
- Dust cover.
- Embroidery foot.
- 7 sewing feet.
- Embroidery hoop.
- Embroidery arm.
- 2 bobbins.
- 3 bobbin clips.
- Needles – This includes 2 90/14 ballpoint needles, 2 75/11 needles, 2 90/14 needles and a 2/11 twin needle.
- Seam ripper.
- Disc shaped screwdriver.
- Cleaning brush.
- Scissors.
- Spool net, caps, and pin.
- Eyelet punch.
- Manuel.
While, you are provided with a large amount of accessories to get you going with your machine. There are still a couple of things you will need to purchase yourself before you start sewing.
You need to purchase embroidery and sewing thread and a stabilizer.
The Different Presser Feet Included
Since, you can do a lot of things with a Brother SE600, it comes with several feet which you can use. Below we have gone into all the feet you can use and are included in the box.
- Buttonhole Foot – You can create one-step buttonholes, which are also automatically sized to your button size.
- Blind Stitch Foot – With this foot, you can sew almost invisible blind hems.
- Spring Action Zigzag Foot – Almost all sewing tasks can be completed using this foot.
- Button Swing Foot – This foot allows you to sew buttons onto your projects with ease.
- Zipper Foot – Quickly and easily sew in zippers.
- Overcasting Foot – Sew seams and professionally finish the edge of any fabric using this foot and an overcasting stitch.
- Monogramming Foot – With this foot you can complete decorative stitches.
- Embroidery Foot – Complete embroidery patterns with this foot.
Even though 8 different presser feet are included with this machine, it doesn’t include a walking foot, piercing foot or quilting foot, which are ideal for quilting.
However, all of these presser feet can be easily picked up separately.
The Different Stitches Included
The Brother SE600 has a massive amount built in stitches for you to use. In fact, there are around 103 stitches included. Although, it is important to note that the maximum stitches length and width is 5 x 7 mm.
The following are all the stitches that you may use on the Brother SE600.
- 4 Straight Stitches – This consists of a left and center needle stitch, with or without a beginning reinforcement stitch.
- 3 Zigzag Stitches – There is a zigzag stitch with and without reinforcement, alongside a right needle stitch as well.
- 1 Stem Stitch.
- 1 Triple Stretch Stitch.
- 1 Basting Stitch.
- Elastic Zigzag Stitches – There is a two-step and a three step elastic zigzag stitch to use.
- 7 Overcasting Stitches – 5 of these stitches are recommended to be used alongside the Brother side cutter. This then allows you to turn the Brother SE600 into a faux serger. The other two stitches can be used on the machine alone.
- 2 Blanket Stitches.
- 10 Hem Stitches.
- 2 Blind Hem Stitches.
- 2 Piecing Stitches – This includes a center and right needle.
- 2 Darning Stitches – The darning stitches are more suited for medium to heavy materials.
- 4 Quilting Decorative Stitches.
- 17 Decorative Stitches.
- 10 Stain Stitches – This includes 5 normal satin stitches and 5 decorative stitches.
- 5 Cross Stitch Stitches.
- 1 Button Sewing Stitches.
- 8 Buttonhole Stitches.
- 1 Feather Stitch.
- 1 Couching Stitch.
- 1 Patchwork Join Stitch.
- 1 Ladder Stitch.
- 1 Patchwork Double Overlocking Stitch.
- 1 Bar Tack Stitch.
- 1 Satin Scallop Stitch.
- 1 Tap Attaching Stitch.
- 1 Smocking Stitch.
- 1 Serpentine Stitch.
- 1 Eyelet Stitch.
- 1 Shell Tuck Edge Stitch.
- 1 Rick-rack Stitch.
- 1 Fagoting Stitch.
Other Features To Be Aware Of
There are various features to enjoy using on the Brother SE600. Alongside the 103 stitches available for you to choose and the multiple button stitches.
You can complete almost any product using this machine.
In addition to this, there is a free arm built into this machine. This allows you to complete smaller and cylindrical sewing projects such as cuffs or pant hems.
Finally, there is a LED light, which helps to illuminate your workspace. As a result, no matter the light you are working in, you will be able to see your stitches clearly.
Verdict
There is a lot to like with the Brother SE600 and the features it has to offer. It has every feature you could need to complete pretty much any sewing project that comes to mind.
Using A Brother SE600 Sewing Machine
If you’re new to sewing or embroidery, you might feel intimidated by the Brother SE600’s computerized face.
It’s not too difficult to learn how to operate the Brother SE600, despite the fact that it may seem sophisticated.
This brief explanation of what each button does will help you understand some of the machine’s amazing capabilities.
Front Four Buttons And Slider
On the front of your Brother SE600, near the left-hand side, you will see four buttons. By understanding these four buttons, you can understand the basics of this machine.
Start/Stop Button
Without using the supplied foot pedal, you can start and stop stitching by pressing the start/stop button. When the machine is prepared to sew, the button flashes green.
When the machine cannot sew, the button shines red. Whenever the bobbin shaft is pushed to the right to wind the bobbin thread, the button glows orange.
Needle Button
The needle can be raised or lowered using the needle button. The needle will move into and out of the material after being pressed twice, thereby finishing one stitch.
Reverse Button
When pushed, the reverse button creates reinforcement or reverse stitches.
Scissors Button
To cut the top and bottom threads, press the tiny scissors button. There is an option to activate automatic thread cutting as well.
Slider
Towards the right of the scissors button, a slider regulates the sewing speed. With ordinary stitching, the highest sewing pace is 710 stitches per minute.
Touch Screen And Keys
On the right of the sewing machine, you’ll find the control panel and related keys to get the panel to work.
Touch Panel
The choice of stitches and embroidery patterns is aided by a respectably sized LCD touch panel (3.2′′ x 1.8′′). Your touch is readily and precisely registered by the screen.
You can navigate to the previous or following choice pages using the arrow buttons.
Use the back key to go back to the previous screen as well. A stitch display and the estimated size is made visible to you on the panel.
Also, the machine shows you which presser foot you should use for the greatest stitching outcomes.
Here, you can modify a number of other parameters, like automated thread cutting, automatic reverse stitching, and even mirror image setting.
Help Key
You may get answers to many questions by pressing the help key. This is marked by a question mark towards the left of a sewing machine.
Settings Key
You can adjust settings, such as the buzzer sound or the needle stop position, by using the settings key.
Embroidery Key
The machine starts to embroider when you touch the embroidery key. This is a little flower on the screen.
Utility/Decorative Key
Choose the utility/decorative stitch key if you prefer to sew a utility or decorative stitch rather than embroider.
This consists of a leaf, straight, and zigzag stitch. After pressing, you can change the stitch’s length or width and choose between a decorative or functional stitch.
Presser Foot Key
You can lock all keys and button operations and prevent the sewing machine from starting while you are replacing a presser foot or needle.
You need to pick the button that features a presser foot and a circle with two arrows.
Verdict
There is no denying that there are a lot of buttons and controls to get your head around. This could be quite overwhelming for anyone who is new to sewing or embroidery.
It may take you a while to get to grips with all the buttons and ensure that you understand where all the settings are and what they can do.
Setting Up Your Brother SE600
For all basic sewing needs, you will need to wind the bobbin. The quick-start guide’s visual instructions or the manual’s thorough instructions make this simple to complete.
There are reminders on the SE600’s body as well.
You don’t need to draw up the thread by hand because the bobbin is a quick-set, top-drop bobbin. Once you begin stitching, the machine will accomplish that automatically.
After that, thread the higher thread in accordance with the directions. Your eyes and sanity will be saved by an automatic needle threader, which threads the needle for you at the push of a lever.
The decorative/utility stitch key is used to choose your stitch, as previously mentioned. For your project, make sure you have the right needle size, presser foot, and thread weight.
You may additionally be required to alter the tension using the tension dial before starting your first project.
The start/stop buttons on the machine’s body or the foot pedal can now be used to begin stitching!
Verdict
Overall, setting up your Brother SE600 couldn’t be simpler!
Winding the bobbin is a straightforward process thanks to all the images and instructions that you are given, so even beginners can understand what they must do.
Also, threading the needle is a breeze due to the push of a lever. Overall, setting up the Brother SE600 is really easy and ideal for a beginner.
Setting Up Your Brother SE600 – Embroidery
There is some additional setup required to go from sewing to embroidering.
Attach the embroidery foot and unit that are provided first. Make sure that the suitable bobbin thread and needle have been chosen and set up.
Also, you need to secure your fabric and set it inside the provided 4″ x 4″ embroidery hoop frame. After that, the embroidery frame is connected to the unit.
Pick your desired pattern from the LCD panel when the machine is configured.
You may use your own design or pattern that you have saved on your USB flash drive, or select from the 80 pre-stored patterns.
Adjustments can be made in the design editing window after selection.
For monogramming, you can enter your letters and move, resize, modify, or position them on arcs. You can even adjust the pattern’s thread colors.
Check the placement of your pattern before you begin to embroider. Given how difficult it is to remove needlework, this function is really beneficial.
You must manually change the thread after each color because the Brother SE600 simply sews with one color at a time.
For each color you intend to use, repeat the steps for preparing the embroidery thread, threading your needle, and sewing.
However, the machine is designed to assist you in choosing the next color, so you’re not on your own!
Verdict
When you wish to use the embroidery function on the Brother SE600, additional set up and predation is necessary.
By embroidering using this machine, it is much faster and more precise than doing it by hand. Thus, you can achieve a much more professional finish.
Also, due to the broad range of designs built in, you aren’t short on embroidery options. However, you can always add your own, thus making this feature really customizable.
Embroidery Designs Included On The Brother SE600
The Brother SE600 machine comes with 80 pre-installed embroidered patterns. Six embroidery fonts are also available.
You can use symbols, numerals, and capital or lowercase letters. Also, there are three font sizes: small, medium, and large.
The Brother SE600 machine’s ability to import and save your own patterns is one of its best features.
You may rapidly transfer embroidered designs that you’ve bought or made using embroidery software utilizing the built-in USB connector on the side. Hence, there are countless design possibilities!
Also, unlike the Brother SE400, the SE600 may be used without a computer by just plugging in a USB.
Which File Formats Can You Use?
For embroidery data files, only .pes, .phc, and.dst files are acceptable. However, the recommended file format is .pes.
You need to be careful on what formats you transfer onto your USB and plug into your machine.
If you don’t use any of the recommended formats, then you risk the chance of damaging your Brother SE600.
The stitch data files .pmx, .pmv, and .pmu can be utilized with decorative stitch memory.
Only stitch data files ending in .pmu or .pmx can be retrieved. The chosen stitch file format, .pmv data files, are automatically saved by the SE600.
Does The Brother SE600 Have Its Own Design Software?
For embroidery on the Brother SE600, you can use your own designs as mentioned above.
Unfortunately, embroidery design software is not included with the Brother SE600.
As such, you have two options: you can digitize software and create your own designs. Or you may buy designs from other makers.
The Brother embroidery design store, also known as iBroidery, sells a huge selection of patterns.
You can also browse your preferred online stores or look at Etsy. Just make sure that any patterns you obtain are in a.pes file type that is suitable.
Browse some of the greatest free embroidery programs to download if you’re on a tight budget. Keep in mind that many free programs have a steep learning curve.
We suggest taking a look at SewWhat-Pro or Embrilliance Basics if all you want to do is modify or alter pre-made designs.
If you need assistance learning, there are several Facebook groups, online tutorials, and YouTube videos that explain how to utilize them.
Software for embroidery digitizing is required in order to generate your own designs.
Three of the most well-liked and user-friendly manual digitization programs are Embird, Hatch, and Embrilliance Stitch Artist. Yet, since they are expensive, you probably won’t want to buy them right away.
Check out SewArt if you’re looking for affordable design creating software. It’s a simple auto-digitizing embroidery tool.
This means that little to no user input is required during the conversion of image files (.jpg, .png, etc.) into .pes embroidery files.
Verdict
While there are 80 great designs already built into the Brother SE600, it is a nice feature that you can add more or create your own designs.
It is crucial that any files you send over to the machine have the correct file format, otherwise you will break the machine.
When creating your own design, there are a lot of options out there for you to choose from.
If you do happen to find a software that you like the look of, there are always various online tutorial videos to help you if you ever get stuck.
Who Is This Machine Most Suited For?
The Brother SE600 is one of the simplest Brother machines to use and learn to use if you’re looking for a sewing and embroidery machine.
After some skill and repetition, the display is rather straightforward and simple to use. Following the thorough directions makes winding, installing, and threading bobbins simple.
This sewing and embroidery machine will assist you while you’re still learning because it’s computerized.
It will support you in troubleshooting issues by presenting a letter that corresponds to the required presser foot.
However, a beginner does need to be aware that the Brother SE600 has a huge amount of features to learn. Thus, it will be trickier to use as a novice when compared to simpler computerized sewing machines.
Your initial designs can be a little lacking in refinement because embroidery and monogramming require skill. At first, you might also find yourself constantly consulting the user manual to refresh your memory on how to set up and operate the device.
Before starting to sew, read the instruction booklet in full to reduce beginner frustration! For those that learn best visually, there are many excellent YouTube videos available.
Verdict
The Brother SE600 could be used by anyone, no matter their skill level. With that being said, there are some elements of this machine which are ideal for beginners.
However, there are a lot of instructions and buttons to get your head wrapped around, which on first impression can be overwhelming.
Anyone could use the machine, but you do need to ensure you read the manual before attempting to set it up.
Is There A Serger On The Brother SE600?
Unfortunately, a serger is not a feature of the Brother SE600 machine. There are a few techniques, nevertheless, in which it can be employed to resemble serger stitching.
The overcasting stitch and overcasting presser foot work well together to produce a seam and finish fabric edges at the same time.
You may want to think about getting the Brother side cutter presser foot if you also wish to trim the edges of the fabric. This tool cuts material while stitching the edges together and completing the fabric.
Thus, it functions something like a fake serger. You are able to perform zigzag, straight, overcasting, or specific side cutter stitch with this presser foot.
Verdict
While it is a shame that a serger isn’t a feature on this machine. It is still possible to recreate it with the presser feet and stitches you have been provided with.
By following the techniques we have outlined above, you should be able to achieve a similar effect.
Can You Complete Quilting Projects On The Brother SE600?
The machine’s somewhat larger 6.4′′ x 4.1′′ throat space makes it possible to stitch many larger items. You ought to be capable of completing most quilts and free-motion quilts on this machine.
It is possible to add ongoing quilting using the embroidery program. However, this will take a very long time because you can only work on 4″ × 4″ portions at once.
If a spring-action quilting foot, walking foot, or 1/4” piecing foot is something you appreciate having, you might want to buy these feet yourself, as they are not included in the box.
Verdict
There is nothing stopping you from using the Brother SE600 for your quilting project.
Unfortunately, you do have a smaller throat space to work with, which means your sewing may take a little longer. However, this isn’t the end of the world, and you can still quilt on the Brother SE6000.
Pros And Cons Of The Brother SE600
With the Brother SE600, there are lots of features that make up this machine. As a result, there are many pros and cons to using and owning this machine.
To make things easier for you, we have compiled the main pros and cons of the Brother SE600, to help you to make a decision.
Pros Of The Brother SE600
There are a lot of good things to like about the Brother SE600, these are as follows:
- Two Machines In One – The main aspect that people love about this machine, is the fact that it is a sewing and embroidery machine in one.
- Stitches – There are over 100 stitches built into this machine, which allows you to complete any kind of sewing project.
- USB Port – You can easily transfer over your own embroidery patterns over to the machine using a USB stick in the USB port.
- Light – A bright, LED light illuminates your workspace, which allows you to clearly see your stitches as you work.
- LCD Screen – A LCD screen offers many functions to allow you to personalize your patterns, and stitches. This also reduces the amount of errors that could happen.
- Needle Threader – The Brother SE600 comes with an automatic needle threader. This is really handy when you need to make various thread changes for a particular design.
Cons Of The Brother SE600
While the Brother SE600 may sound amazing, it isn’t without its own faults. Below are a number of cons associated with the Brother SE600:
- Embroidery Area – The embroidery area on this machine is 4 x 4 inches. Now for most people, this may be more than enough space. Yet for an embroidery enthusiast, this may be quite a small area.
- Embroidery Software – To create your own embroidery designs, you will need to buy your own software. Unfortunately, some of these can be quite pricey, which isn’t ideal if you are on a tight budget.
- Stitch Speed – While the stitch speed of 710 stitches per minute sounds impressive, compared to some higher end models, this isn’t that fast. There is nothing wrong with this speed, but you will find that your projects do take a bit longer to complete.
- One Needle – The Brother SE600, is a one needle machine. Thus, this can be frustrating if you are completing a design with various thread colors, as you will have to manually change the color each time.
Conclusion
The Brother SE600 is a great machine to own, it combines sewing and embroidery into just one simple machine to use.
There are a plethora of features to use with this machine, which makes it very sought after.
The main advantages are that it can handle most kinds of fabric and has a vast range of stitches built in, which means you can even quilt on this machine as well.
For a beginner, this machine might be slightly too advanced. However, most people will enjoy how versatile it is. No sewing or embroidery project is too big for this machine.
We hope you have found this review helpful. Hopefully, you now have a better understanding on whether the Brother SE600 is the right machine for you!
- How To Sew Fabrics Together - June 5, 2023
- How Many Stitches Per Inch? - June 5, 2023
- How Long Does It Take To Sew A Dress? - June 5, 2023
