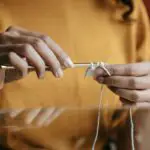
Woolen knits, crochet, or woven goods, such as slippers, purses, mittens, and more, can be transformed into a soft and dense fabric by felting.

It’s been around for many decades and is definitely a technique that you should consider adding to your skill set.
If you’re a beginner when it comes to felting, then this guide is for you!
Here, we’ll teach you everything you need to know about felting, including what it is, the different methods, and how to carry them out. So, let’s get started!
What Is Felting?
100% pure natural wool is used to create the textile known as felt. The wool is matted, compressed, and pressed to create this material.
Felting is the technique of joining the individual fibers of a protein fiber, such as sheep wool, to create a fabric.
Simply put, wool felting is the process of creating anything with a mold made of wool.
There are three different ways you can felt wool; needle felting, wet felting, and commercial felting.
Commercial felting isn’t something you can do at home and is a technique used by manufacturers.
Needle Felting
Using specific, barbed needles, you can create a matted piece of felt by tangling the threads together. The wool is repeatedly cut through by the needles in the dry wool felting technique.
This can be carried out manually using one or more needles, or it can be automated.
A range of machines, from smaller hand-held ones to larger table top felting machine-type models, are available for needle felting.
Wet Felting
Wet felting is a process in which warm, soapy water is applied to layers of wool that are 90 degrees apart from one another, forcing them to hook together into a single piece of felt.
Wet felting works best with a select few fiber types. The majority of fleece varieties, including those from sheep or alpacas, can be wet felted.
How To Felt Wool Using The Needle Method

What You’ll Need
- Wool
- Felting needle
- Felting pad or sponge
- Cookie cutters
Directions
1. Thin Out The Wool
Thinning out your wool is the first thing you should do. Generally speaking, needle felting works better with multiple thin layers of wool than with a single thick layer.
A layer can easily be removed after everything has been completely felted, but you can always add more layers to thicken your piece.
To thin out the wool, gently open it up with your hands until you can just see through it. Don’t be afraid to give it a good tug.
2. Start Felting The First Side
Next, set one of the cookie cutters atop your felting pad or sponge. After that, insert the thin layer of wool into the cookie cutter, making sure to get the wool into all of its corners.
Pick up your felting needle, carefully insert it into the felting pad through the wool, and then carefully pull it back out.
The needle doesn’t need to be inserted all the way into the pad. Just be sure to insert it completely through the wool.
Continue sticking the needle in and out again, making sure that you felt the edges as well. The strands will start to meld and mat together.
3. Felt The Other Side
Remove the cookie cutter and lay it aside after completely covering the top side of the wool for a few minutes.
Now, delicately remove the wool off the felting pad by running your fingers along the edges. Although it might lose some of its shape, that’s fine.
Put your piece back inside the cookie cutter after turning it over. Similar to the first side, start working on this one.
Using the needle, gently poke the entire surface of the wool, paying particular attention to the corners and edges.
Repeat the previous steps. Peel the felt back off the mat and flip it over once more.
After that, add another layer of wool and continue to work it. Continue doing this until all of the wool is matted.
4. Test The Felted Wool
Gently pull at the piece to check how well the wool has matted and see if it comes apart.
The felt is ready for use once the wool is holding together properly and not falling apart.
How To Felt Wool Using The Wet Method
What You’ll Need
- Wool
- Hot water
- Dish detergent
- 2 pieces of bubble wrap
- Plastic tablecloth
- Spray bottle
- Towels
Directions
1. Lay Out The Wool
First, place a large bowl on the table that’s covered with a plastic tablecloth. Then, lay the bubble wrap (bubble down) on top of that.
Take the piece of wool and gently pull thin tufts from one end and lay the fibers down in a row so that they overlap by half an inch.
Add more rows of the fiber until the piece of wool is about a third bigger than the final size to allow for shrinking.
2. Spray With Water
Fill your spray bottle with hot, soapy water. Give it a shake and spray a generous amount on your wool.
Work the water into the wool by moving your hand back and forth gently until there are no dry patches.
3. Add Layers
Add another layer of wool that’s perpendicular to the first. Repeat the first and second steps. Continue adding layers until you have at least four.
4. Pre-Felt The Wool
To pre-felt the wool, place a second piece of bubble wrap on top of the wool fiber and rub it with the flat of your hand, working the entire piece, including the edges, and gradually increasing pressure.
5. Test The Felted Wool
Peel back the top layer of bubble wrap and test the wool by lightly pinching and pulling on the wool. If it doesn’t hold together, add more water and continue pre-felting the wool.
6. Full The Felt
The fibers shrink and solidify during fulling, the last stage of wet felting. Roll the bubble wrap and your wool tightly inside a towel, sandwiching it between the two layers.
Roll the bundle back and forth with your hands for about five minutes. If your roll splits, simply reroll it and carry on.
Final Thoughts
With this guide, you should have no problem felting your wool! Whether you choose to needle felt or wet felt, you’ll be able to do it with confidence and have an amazing final product.
- How To Sew Fabrics Together - June 5, 2023
- How Many Stitches Per Inch? - June 5, 2023
- How Long Does It Take To Sew A Dress? - June 5, 2023


