Using A Twin Needle To Stitch Knits: Your Complete Guide
While hemming non-stretchy fabrics on a sewing machine is usually simple enough, when it comes to stretchy, knitted fabrics, things can get complicated.
Knits can easily stretch in the process of stitching, which can cause the seams to twist, look wobbly, or pop.
The result often looks unprofessional, and you may find yourself dreading sewing projects like these.
Luckily, there’s an easy way to make sewing knits a lot easier: using a twin needle!
If you’ve never used a twin needle before, don’t worry – this is your complete guide to stitching knits with a twin needle for professional and long-lasting results.
In this guide, we will be explaining how to set up your sewing machine for hemming knits with a twin needle.
We’ll also be outlining some common issues you might encounter when using a twin needle for knits, and how you can overcome these obstacles.
Why A Twin Needle Is Great For Knits
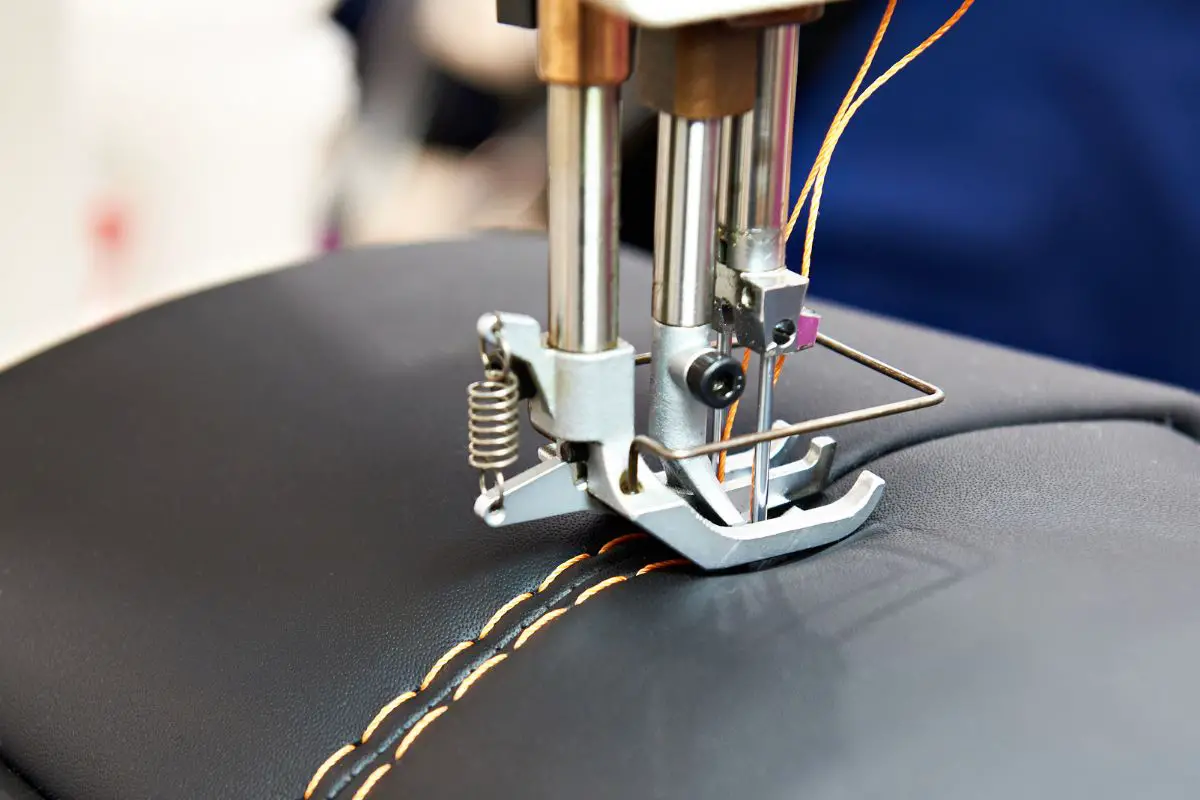
We always recommend using a twin needle for stretchy knit fabrics. The reason is that a twin needle consists of two needles that are parallel to one another.
When you use a twin needle in a sewing machine, it creates a double row of stitches on the top of the material, while underneath, you’ll get a row of stitches that looks like a zigzag.
Because of this zigzag stitch, you have more room for the stitch to stretch out, meaning you won’t end up with all the tension-related problems you face when sewing stretchy fabric with a standard needle.
With that being said, it’s important to bear in mind that not all twin needles are created equal.
The type of twin needle we specifically recommend using for knits is a ballpoint needle, which is specifically designed for stretchy, knitted fabrics.
A ballpoint needle is designed to reduce the risk of missed stitches, which is something you’ll probably encounter at some point when hemming knits on a sewing machine.
Choosing The Right Twin Needle For Your Project
Not only should you make sure that the twin needle you’re using for knits is a ballpoint needle, but you should also pay attention to the size and width.
The right width and size will vary depending on the specific project you’re working on, so be sure to consider these factors each time you sit down to sew.
If you’re working with a more delicate knit, we recommend a needle size somewhere between 60 and 75, or 8 and 11.
On the other hand, thicker knits or knitted fabrics with elastic in the hem will call for a larger needle (think 90/14).
For twin needles, width is measured in millimeters. Usually, with a stretch twin needle, the average width is around 4 millimeters, although you can also use a 2.5 millimeter needle in some cases.
Just be aware that with thinner needles, it’s more difficult to avoid ridges.
Finishing The Edges
If you’re going to the effort of learning how to use a twin needle, we’re guessing you want your finished product to look as professional as possible.
If that’s the case, you should make sure to finish the edges before you go in with the twin needle.
This is best done on a serger sewing machine. You can use an overlock stitch (either 4-thread or 3-thread) to make the edges look neat and stop any annoying curling and tunneling.
How To Stitch Knits With A Twin Needle
Thread The Sewing Machine
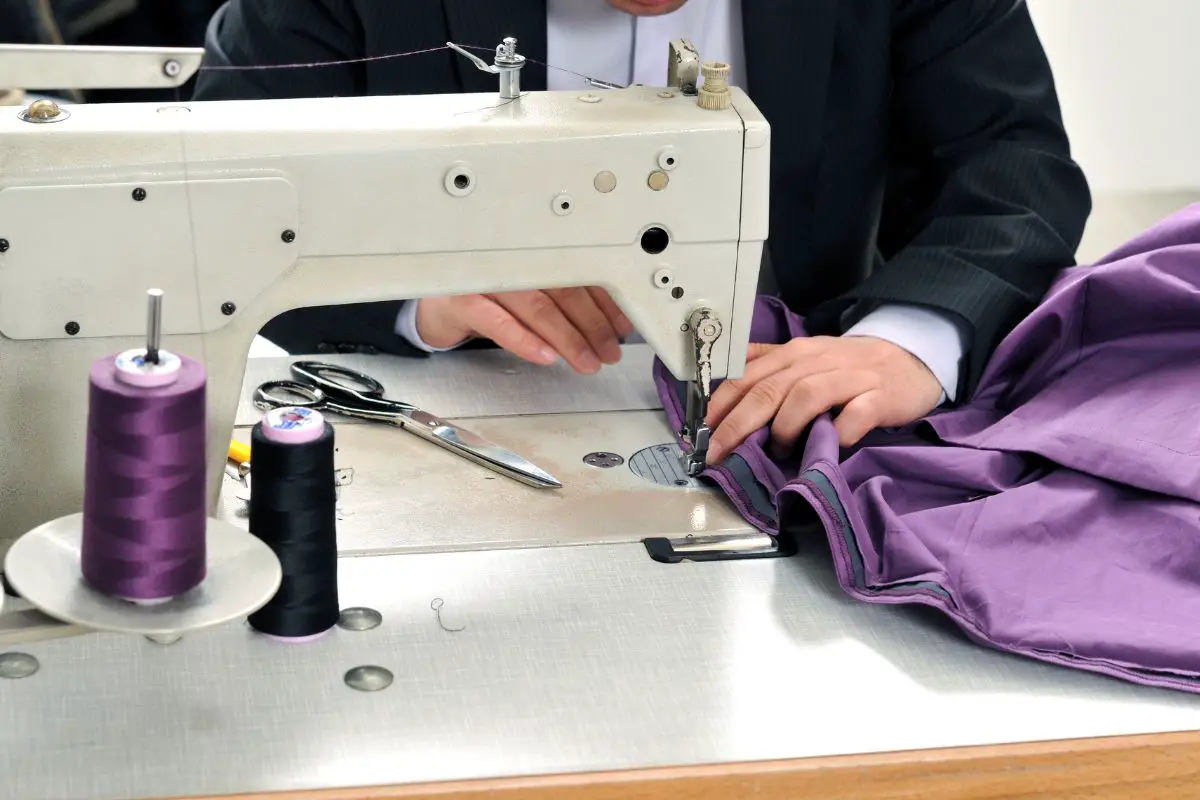
Before you can get sewing, you will, of course, need to thread your sewing machine.
The exact threading process will vary depending on what sewing machine model you’re using, but you should usually be able to follow the basic instructions for single-pin machines versus double-pin machines.
Always start by raising the presser foot before you start threading.
If you don’t raise the presser foot, the tension disks won’t be released, and the fabric won’t feed through the machine smoothly when you start to sew.
For machines that have a single pin, you will need two bobbins. Wind both bobbins and put them both on the pin, one on top of the other.
If your machine has two pins, you will only need one bobbin. Alternatively, you might use a spool, depending on how your machine is designed.
If you’re at all unsure about how you should thread your sewing machine, the best thing to do is consult the user manual that should have been included with your purchase (see also “Common Reasons Your Sewing Machine Keeps Jamming“).
If you don’t have a physical copy, look up the model name and number online, and you should be able to find a digital copy on the manufacturer’s website.
Certain sewing machines have a setting for twin needles.
This shouldn’t change the way you thread your machine, but you’ll need to take care to feed the thread in the middle of the tension disks and not to let the thread get tangled at any point.
Choose The Stitch Length
The next step to getting started once you’ve threaded your machine is to select the correct stitch length. Most of the time, anywhere between 2.5 and 3 millimeters should work well.
Don’t be tempted to make the stitch longer than 3 millimeters.
You might think that longer stitches would mean more stretch, but this is actually not the case since, with a twin needle, the stretch in the stitching comes from the intersections of the zigzag underneath.
The longer your stitches are, the fewer intersections you’ll end up with, and the less stretchy your stitching will be.
Adjust The Tension
When it comes to choosing the right needle tension, you might need to do some experimenting to find out what looks best on the material you’re using.
We can tell you that you’ll definitely want to avoid higher needle tensions on stretchy knits because this tends to cause tunneling and puckering.
However, it can also be a mistake to opt for very low needle tension.
Initially, you might think that the lowest needle tension looks the best because it appears neat on the top side of the fabric, but when you turn the material over, you’ll probably notice a lot of thread loops.
Somewhere on the lower end of the tension spectrum tends to work out best, but again, you should test out different tensions on a separate piece of fabric (ideally, the same material) before you get started on the real thing.
Back Stitching
You’ll hear a lot of different opinions regarding whether you should back stitch when using a twin needle for knits, and we can see both sides.
It’s true that when you’re working with a twin needle, your threads can easily become tangled.
Obviously, the risk of tangling gets higher when you incorporate back stitching, so this is probably why many people will tell you to avoid it.
However, as long as you make sure to thread your machine carefully and pull back your threads before you start working, you shouldn’t have too many issues with back stitching.
Whether you choose to back stitch when hemming knits with a twin needle is a matter of personal preference and confidence in your threading abilities.
Common Issues And How To Fix Them
Even when you thread your machine properly and pull back the threads before putting the presser foot down, you can still encounter some frustrating problems when using a twin needle for sewing knits.
Luckily, though, there are some tricks of the trade you can rely on to get yourself out of sticky situations or prevent them from happening in the first place.
Missed Stitches
Missed stitches, otherwise known as skipped stitches, are one of the most common issues we’ve come across when using a twin needle on stretchy knit material.
Thankfully, though, this is also one of the easiest obstacles to overcome.
1. Keep The Fabric Flat
Most skipped stitches happen in moments when the presser foot isn’t flush against the material. For example, if you’re going over a seam, you might end up with a couple of skipped stitches.
If you know ahead of time that you’re going to need to stitch over a seam with a twin needle, we recommend investing in something called a height compensation too, or a hump-jumper.
This is a tool you can slide under the presser foot before you go over an uneven part of the material, and it will help to make sure that the foot remains in a horizontal position the whole time.
Alternatively, you can buy yourself a rubber mallet, which you could use to flatten the seams.
You don’t need to hammer with much force (in fact, we recommend being gentle) but this method is ideal for minimizing the unevenness of seam intersections.
If you’re feeling confident, something else you can try is making a small cut in the seam allowance.
Fold one part of the cut seam one way, and fold the other half the opposite way.
Once you’ve done this, the surface should feel much more balanced and be easier to sew over without missing a stitch.
2. Use The Right Needle
As we mentioned earlier, we would always recommend using a ballpoint needle for knitted fabric rather than a regular twin needle.
That’s because ballpoint twin needles are more effective when it comes to passing through the fabric, so there’s less chance of stitches getting skipped due to partial penetration.
If you’re not currently using a ballpoint twin needle, you can get one here for a reasonable price and see the difference for yourself.
Popped Seams
A popped seam can be very frustrating, but fortunately, it’s easy to stop this issue from arising again in the future.
All you need to do is make sure you’re using a shorter stitch length so that your stitches have more give to them and aren’t under so much tension.
Ridges (Tunneling)
Ah, the dreaded ridge, also known as tunneling.
First-time users of twin needles always seem to encounter this problem, and while it’s definitely annoying, the good news is that there are several ways of fixing it.
First, if you’re not sure what we mean by tunneling, it’s when you end up with a puckered ridge of fabric between the two lines of stitches.
To an extent, some ridging or tunneling is to be expected when you’re sewing into stretchy materials, particularly when it comes to garments.
Even if there don’t seem to be any ridges while you’re sewing, you may notice some when the fabric is stretched out.
With that being said, you’ll want to keep this to a minimum, and there are ways of making sure that the tunneling isn’t too noticeable.
1. Don’t Stitch Over The Edges
It’s tempting to use a twin needle to stitch over the edges of the material to keep the other side looking as neat as possible.
Unfortunately, this usually results in more ridging and tunneling because the stitches won’t be even.
Therefore, we would never recommend covering the edges of your fabric with a twin needle stitch if you want to minimize the appearance of tunneling in the finished work.
2. Fusible Stretch Interfacing
For the folded hem, it can help to get some fusible stretch interfacing to reduce tunneling.
This might not always work perfectly, especially with very stretchy fabrics or synthetic materials, but we recommend trying it out.
The point of fusible stretch interfacing is to make the material feel firmer so that it moves less during the sewing process.
This will help to reduce tunneling, even when the material is stretched after sewing.
3. Turn Down The Needle Tension
If your needle tension is too high, your material will probably not lie as flat as it could while you’re sewing.
Therefore, if you reduce the tension from the needle, your material will flatten, and you will end up with less tunneling as a consequence.
However, if you look back at our section about needle tension above, you’ll remember that very low needle tension can cause messy stitches on the reverse of the fabric.
Therefore, you’ll want to be careful not to reduce the tension too much, and if your tension is already very low, you should probably try a different method of preventing tunneling.
4. Adjust Bobbin Tension
We would never recommend adjusting bobbin tension as a first resort to deal with tunneling because you might end up damaging the bobbin.
However, if you have an extra bobbin and have tried other methods without success, it’s worth a try.
Most bobbins will have a screw that you can turn slightly to increase or decrease the tension.
However, be careful here because even the smallest turn of the screw can make a big difference in overall bobbin tension.
That’s because, with a regular sewing machine, knitted fabrics are usually pulled through unevenly due to their malleability.
As a result, it’s pretty common for stitches and seams to come out looking uneven. They might be wobbly, or the stitches might be stretched out more in some places than others.
Unsightly draglines where the fabric has been twisted are another thing you might have to contend with.
1. Use A Stabilizer Or Tape
The easiest way to stop your fabric from stretching or twisting while sewing with a twin needle is to use either a stabilizer or double-sided tape.
Tape or a stabilizer will keep the fabric layers flat and together as they pass through the machine, meaning that your stitches will come out looking neat and even.
This has always worked for us, even with the stretchiest of synthetic fabrics, so it would be our first recommendation if you’re encountering this problem.
2. Invest In A Walking Foot
Another effective solution to the problem of twisting or stretching knit fabric is to use a walking foot in your sewing machine rather than a regular presser foot.
A walking foot basically helps to feed both layers of your material through the sewing machine at the same time, ensuring that the top layer doesn’t get pulled through more than the bottom layer.
If you don’t want to be responsible for controlling the feeding yourself (we get it, it can be stressful) then a walking foot will take some of this pressure off you and help you with your knit hemming projects.
3. Use An Awl For The Top Layer
If you don’t want your fabric layers to be fed through your sewing machine at different times, resulting in uneven stitches, you need to make sure that you’re actively feeding the top layer into the presser foot.
The best way to do this is using an awl. You can use an awl to physically push the top layer of material across the sewing surface so that it gets fed through the presser foot at the right time.
We recommend practicing this method a few times before you use it for a project you’re invested in.
It requires a fair amount of coordination and an eye for detail, but once you understand the rhythm, you’ll never have to deal with uneven stitches due to stretched fabric again!
Frequently Asked Questions
What Stitches Can I Use With A Twin Needle?
The stitches you’re able to execute using a twin needle will partly depend on what machine you’re using.
That’s because different machines have different stitch settings, and some have a specific twin needle setting that may limit the number of stitches you can use.
All machines should be able to do a straight stitch with a twin needle, but many machines will allow you to do a zigzag stitch.
If you have a more high-end sewing machine, decorative stitches may even be possible using a twin needle, but you’ll need to be careful and make sure that these more elaborate stitches don’t result in thread tangling.
Can You Use A Twin Needle On A Regular Sewing Machine?
It’s normally best to use a coverstitch machine if you’re going to hem knitted fabrics with a twin needle because it’s better at keeping fabric in place and preventing stretching.
However, this doesn’t mean you can’t use a twin needle on a regular sewing machine.
In fact, the vast majority of regular sewing machines can use a twin needle, so if you’re working with a standard domestic sewing machine, you should still be able to work with a twin needle without any issues.
Why Is There No Zigzag With Twin Needle?
A twin needle should produce a zigzag stitch on the back of your material. If you can’t see a zigzag when you turn your material over, this usually means something has gone wrong.
If stitches are being skipped altogether, it’s usually an issue with how you’ve threaded the machine. In this case, it’s best to stop and check that your machine is threaded properly, re-threading if necessary.
However, if all the stitches are there, but the zigzag stitch on the back is not easily identifiable, the needle tension is probably too high.
The good news is that you can adjust needle tension quite easily.
How Do I Check If Bobbin Tension Is Correct?
We don’t usually recommend tampering with bobbin tension, but sometimes, you may need to check if the bobbin tension is the reason for issues with your twin needle stitches.
Once you put the bobbin into its case, you should be able to hold it by the tread without it sliding.
If the bobbin slides all the way down when you gently tug on the thread, it’s too low, but if it doesn’t move at all, there’s too much tension.
Final Thoughts
Using a twin needle is the best way to hem stretchy knit fabric, but you may still encounter some issues along the way.
For the best chances of success, make sure to use a ballpoint twin needle and pay attention to needle tension and stitch length.
Use a walking foot, stabilizer or awl to prevent stretching and twisting.