Are you looking for a handy, everyday bag that you can take anywhere? Not wanting to spend money on buying one brand new? Why not sew your own?
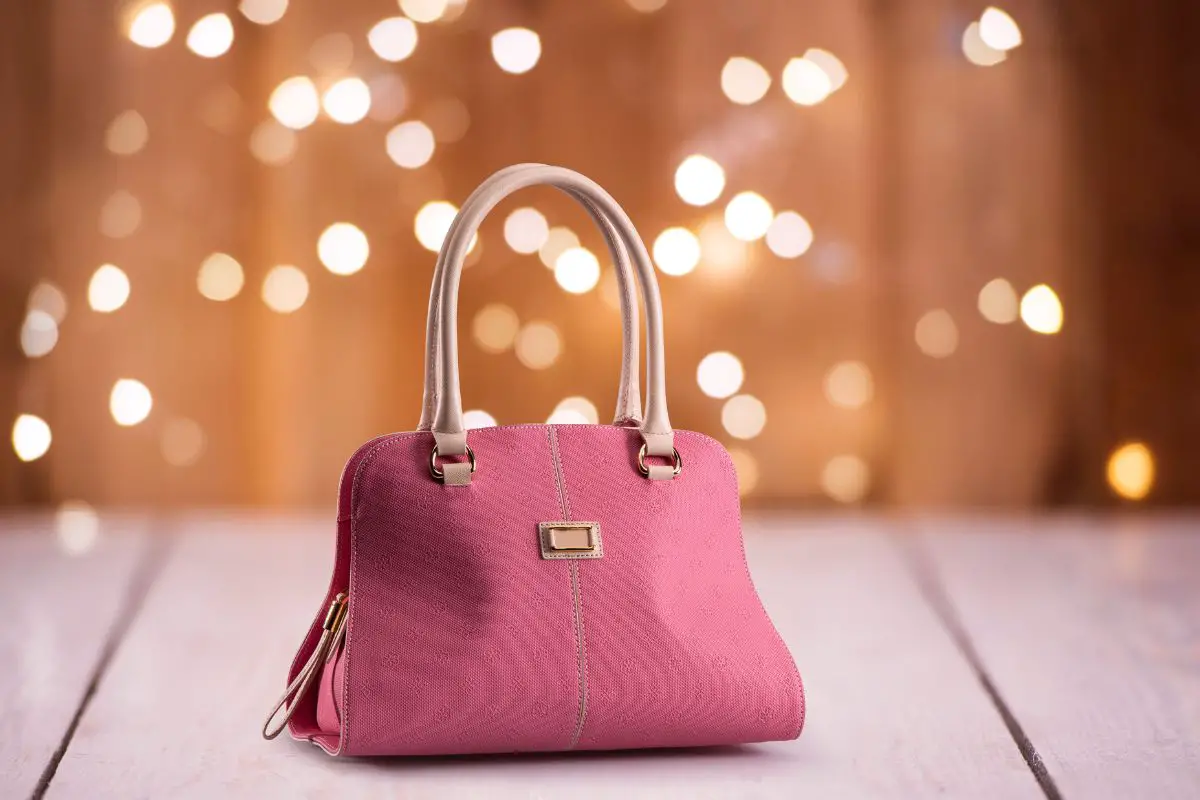
An asymmetrical bag is a great addition to your wardrobe, and what’s better than having your own bag that no one else owns?
About The Asymmetrical Bag
An asymmetrical bag is one that is not even or symmetrical. This bag would have parts that do not correspond perfectly to one another, or one side is different from the other. This makes for a unique look and fashion statement.
Having everything the same makes for a boring world. Why not stand out from the crowd with a truly different bag from everyone else?
By having a design that has varying angles and shapes, it can really be eye catching and draw attention.
Not only is the bag nice to look at, but also highly functional.
With this bag, you can carry all of your everyday belongings and supplies, and with a fold over asymmetrical side, you can wear it folded over, or fill the extra space with more things that you need!
What we love about this design is that it is a crossbody bag. This means that your hands are always free if you’re running errands, walking the dog, or simply carrying your morning coffee.
Asymmetrical Bag Pattern Tutorial
With this bag pattern, you can make your own unique, stylish and useful bag (see also “How To Make A Bingo Bag“). The front of the bag has a large, smooth surface area, with no zippers or pockets so that it can fold over on the one side.
There will be a D-ring, and a clip on the top side of the bag, so that you have that fold over function that makes this bag so attractive.
With a fully adjustable shoulder strap, you can wear this bag on one shoulder, or put it across your body for hands free movement.
On the back side of this bag, you could add a zipper so that you have a pocket for easy access. This can be added with a simple fold and stitch technique, but we’ll walk you through it.
What You Will Need
- Sewing machine
- Seam ripper
- Seam gauge
- Ruler
- Setting tools for the rivets
- Scissors
- All purpose thread
- Zipper foot
- 2 yards of 1 inch belting for the bag strap
- 1 yard of 44” quilting cotton for the lining
- 1 yard of 44” mid weight cotton for the exterior and pocket
- 8 rivets
- ¼ yard of half an inch webbing for the tabs
- 16” zipper
- ½ yard of 44” fusible fleece
- Small amounts of 20” fusible interfacing
- 1 hook
- 1 ½ inch D ring
- 1 1” slide adjuster
- 2 1” D rings
- 1 1” hook
Instructions
This tutorial will give you a bag that is about 15” by 11”, but you can adjust the sizing to your own preferences.
- Once you have your fabric chosen, and all of your supplies, it’s time to start. With the fabric for the exterior and lining, cut one 8 x 8” square for the lining of the pocket, then cut one 16” wide x 20½” high cutting for the front exterior, and one 16” wide by 20½” cutting for the back exterior, and sub cut this horizontally so you have two pieces.
- With your chosen lining fabric, again, cut an 8” x 8” square for the pocket, then a 16” wide x 13 ½” rectangle for the pocket lining. Then, cut two 16”wide x 17 ½” rectangles for the lining. Take your fusible fleece, and cut one piece of 15” x 17” rectangle for the front, one 15” x 7” rectangle for the back, and one 15” by 8 ½” rectangle for the bottom.
- Next, cut one 7” x 7” square for the interfacing, and one 60” length and two 3 ¾ lengths for the webbing. Finally, with the ½ inch thick webbing, cut one piece 4 inches in length, and one 3 inches in length. Be sure to seal the webbings after cutting.
Now it’s time to sew.
- Take your three exterior panels, you should have two for the back, and one for the front, and your three pieces of fusible fleece. With your front panel, put the fleece on the incorrect side, so that it is placed about 2 ½ inches down from the top of the edge, and about a half inch from the bottom and side edges. Then, fuse it in place.
- Repeat for the back top panel. Then, for the back bottom panel, add the fleece, again so it is 1 inch down from the raw edge, which should be the one next to where your zipper will go, and a half inch from the bottom and side edges.
- Then, with the upper edge of your front panel of the exterior of the bag, fold it back to the top edge about ½ an inch and press it down. Then, fold back another two inches, to create your hem. Pin it gently in place.
- Next, move onto the D-ring for the front of the bag. With the ½ inch D ring, and your 3 inch cut of webbing, you will want to get the front exterior panel, and measure around 11 ½ inches down from the top folded edge of your fabric, and about 6 inches from the right edge. Pin this, and add a second pin to mark at 1 ½ inches below the first pin.
- With your 3 inch webbing length, you’ll need to fold down one end about a half inch, which will make the bottom. Then, put the raw end through the D ring and fold it back. Pin these in place.
- Once your D ring is in position, you will want to place it where you just put your two marking pins, and put these through the webbing. Mark a spot for two rivets, then set them, sealing with a hammer.
The next step is to work on the zipper.
- With your two back exterior panels, you should have fused the fleece already. Grab the zipper fabric and pocket fabric you have already cut out. With the bottom exterior cut, fold the raw edge and press down. Grab your exterior panel, and pocket panel and put the wrong sides together, so the pocket panel is sitting up and the folded edges align. Fold again and pin.
- With your zipper, measure out ⅝ inches out from the pull end, and mark a line. You can use this marking to align with the fabric edge, so that you have a half inch seam and some breathing room to work with.
- Then, take the zipper and place it flat down, right side up. Turn over the bottom layered panels you have so they are also right side up, and position close to your folded edge. Pin the bottom sections in place, and ensure the folded edge is ¼ of an inch from the center of the teeth on the panel.
- Add a matching thread to your machine, and lengthen the stitch, while attaching the zipper foot. We recommend edge stitching across the entire panel. When this is done, grab the top exterior section and fold the raw edge and press.
- Now, add your bottom exterior section the right way up to your work station. Add the bottom folded section edge to the top one, keeping the same width from the teeth so it’s even and pin in place. Now flip it over so it is the wrong way up. Fold the raw edge of the bottom lining so it aligns the same as the top section.
Take it the right side up and pin through all layers to hold in place. Again, edge stitch across your top panel. You should have some extra zipper tape so just cut this off.
- As you did before, fold the raw edge of the assembled back panel a half inch and press. Fold another 2 inches back for the hem, and press again. Pin the position to keep it there.
- Now, with the exterior front to back, you can add your D ring tab. Grab both the back exterior panels and front exterior panels, unfolding the hems so that you can stitch all the way along. Then, place the front and back exterior panels, and align all of your raw edges, and pin them together.
- Using a standard presser foot, and a normal stitch length, stitch both seams with a half inch seam allowance.
- Once both of your seams on the side of the bag are stitched, grab your two 1 “ D rings and your two lengths of 3 ¾ inch webbing. Fold up the end of one length and pin. Take the raw end and place through the D ring, and pin in place. Make your second D ring.
- Now the exterior bag, which should look like a tube should be turned the right way out. On the right seam, place the tab central over the seam, so the bottom edge is around 9 inches up from the bottom of the raw edge. Pin this in its place.
Add thread to your machine and secure the tab with an open box stitch.
- Next, with the left seam, you’re going to need to have the bottom of the D ring around a half inch from the folded top hem, and pin it in position. Unfold your hem, and stitch the tab in place, but not through the actual folded top hem. Just stitch through one single layer. Again, secure with an open box stitch.
- Again, as instructed earlier, mark out placement for two rivets, and ensure they are central and equally spaced, and set the rivets. Now, turn the exterior of the tube inside out and pin all of the panels in place.
- Using a normal stitch length, rethread your machine to match your fabric, and use a half inch seam allowance to stitch the bottom. Try not to do so on top of the fusible fleece material.
- Keeping your sewn exterior of the bag inside out, make 4 inch box corners, and measure these out on each corner of the bag. Cut away both boxes. Then using the seam allowance, align the side and bottom seams and flatten down the corners and pin in place. Now, double stitch across the corners with a half inch seam allowance.
- The next step is to move onto the pocket and lining. With your two lining panels, and two lining pocket panels, along with your fusible interfacing, you can center this on the wrong side of the exterior pocket panel, and fuse.
- Then, place the exterior pocket panel and lining pocket panel and ensure all edges fit neatly together, and pin in position. You should have about a 2 inch opening at the bottom for the purpose of turning.
- Again, with a ½ inch seam allowance, stitch all four sides and lock the seams on either side of the opening. Now, clip your corners, and press the seam allowance open.
- The next step is to turn your pocket to the right side out with the bottom opening. Within a blunt end tool, push the corners out. Using your iron to press the pocket so it is nice and flat, press down the raw edges of the allowance to ensure they are straight with the seams.
- Grab your main lining panel, and position right side up, adding the pocket on the lining panel so that it is 4 inches down from the top edge and centered. Pin, and edgestitch with your machine, pivoting the corners.
- Now it is time to position the back lining panels and front lining panels the right way together, sort of sandwich the pocket in between, and pin and stitch again.
- As mentioned above, create box corners again in both bottom sides of the lining. You should now be able to see your bag taking shape. It’s time to assemble both the exterior and the lining. Place them the right side out, and put the lining inside of the exterior of the bag where it belongs! Ensure the lining is positioned so that the pocket is touching the back part of the bag, where your zipper is going to be.
- Your top edge of the lining should be about 2 and a half inches down from the top of the exterior of the bag. Be sure to refold the hem of the exterior, so that it covers the top of the lining, and pin in place. Then, edge stitch all the way around the top of the bag.
We’re nearly at the finish line!
- Now, you’ll need to add your hook closure to the bag. To do so, grab your hook, and the 4 inch length of a half inch width of webbing. Place the hook through to attach, and fold the ends in as you did for the D rings.
- This hook should be positioned on the back of the bag, where the pocket will be. If you’re looking at the bag (as if wearing it), your hook will need to be on the left hand side, so that it can fold over and attach to the D ring, creating that asymmetrical shape.
- So, your bottom folded edge needs to be ¾ of an inch above the seam of the hem at the top, and the ledge edge of the tab will be half an inch from the left seam. If you pin it in position, the hook should be about half an inch from the top fold of your bag.
- Once again, mark where your rivets will be, ensuring that they are centered much like you did with the other tabs. Attach the rivets.
- Finally, it’s time to do the strap. With your longest length of 1 inch webbing, and a swivel clip, insert the raw edge end of the webbing through the clip, and pull it back on itself about an inch or so. With your machine, zig zag across the folded back part of the webbing to make a seam, you may have to do this two or three times to secure it.
- With the other end of the webbing, slip the adjustable slider over it. Then, take the free end and place through the left side D ring on your bag, and back over the slider and slide it through until it sits properly.
- Once it’s in, pull the back end in on itself, and again secure it with a zig zag stitch, making sure the seam is near as you can get it to the center bar. Then, clip your hook to the opposite right side D ring, and fold the top down on the bag and clip over the front to achieve that lopsided asymmetrical look.
Voila! You’re done!
If you’re still a little unsure of how to make one, and would prefer to follow a pattern yourself, then you can use this similar asymmetrical bag pattern from Etsy as a guide.
Final Thoughts
So there you have it, a simple way to make your own asymmetrical bag! As it is with many bags, it could get dirty from use, but the fabric can be delicate.
Therefore, it is best to spot clean your bag if there are any marks or stains on the fabric. You can do this by wetting the spot with warm water and a little soap, and softly rubbing away at the mark with a cloth.
However, if you have chosen durable fabric, then the bag should be safe to place in the washing machine on a gentle cycle with cold water. Then, simply air dry.
You could also use a protective spray to ensure that your bag lasts for much longer.
We hope you have fun making your very own asymmetrical bag!
- How To Sew Fabrics Together - June 5, 2023
- How Many Stitches Per Inch? - June 5, 2023
- How Long Does It Take To Sew A Dress? - June 5, 2023
